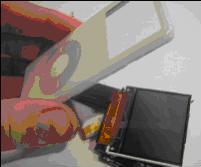
How to IPod LCD Replacement Instuctions

 How to replace iPod LCD Screen by yourself.

iPhone iPod LCD replacement tutorial has total 20 steps. On this page, you will find 11 to 20 steps for iPod display screen replacement. First 10 steps you will find at iPod lcd repair. You can use this procedure to open iPod display screen and replace iPod / iPhone screen. These steps provide details information about how to assemble iPod and how to disassemble iPod for LCD screen replacement.

Tutorial How to open iPod LCD display screen for replacement.


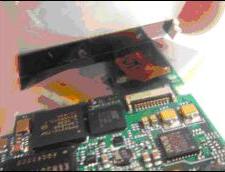
11. Lift up the LCD screen. Now careful LCD screen is connected with main mother board with ribbon cable connector with black tab. Flip up the black tab. The LCD screen ribbon cable should unlock
easily. You shall careful about iPod LCD replace steps.


IPod lcd replacement

12. Taken out the iPod LCD screen.How to open ipod lcd for replacement
Insert new LCD screen ribbon cable into the connector of main board and lock the black tab of ribbon cable. Avoid scratches during iPod display screen replacement.
iPod lcd replacement tutorial
Remove the protective film (which is used to avoid scratch in packing of LCD screen) from the LCD screen.How to replace ipod lcd
15 . Slide the LCD screen back on to the main board and you need to follow reverse steps as while you have open the iPod iPhone. This is important steps for iPod screen replacement.
Replace iPhone screen by yourself
16. Carefully push the main board back into the case.17. Push the battery where it was. How to replace Nano battery has same steps as above.Steps to open iPod display screen
18. Reinsert the 3 screws,be sure one with the coarse thread goes in the middle, and the 2 with fine thread go near the bottom.Disassemble iPod for screen replacement

19. Make sure all the tiny metal tabs on the case are pushed down. So they're aligned with the case surface and not sticking up.

How to assemble iPod for screen replacement
20. Make sure hold switch is aligned with the case, then snap the iPod together. You have successfully replace iPod screen by yourself.
Entire procedure for ipod display screen replacement

IPod LCD Repair Screen and Changing

How to repair iPod LCD screen, how to assemble iPod for screen replacement and dissemble iPod to change LCD display screen.

Do it yourself iPod LCD repair and screen replacement instructions. Here is steps for iPod nano screen repair ( back plate LCD). But these steps is common for other types like 5th generation, some iPhone and iPad. You can also learn how to assemble iPod and how to disable iPod.


Instruction for how to replace iPod LCD screen. 

Steps for iPod LCD replacement are common for almost all generation iPod, iPad and iPod nano(back plate LCD). This step by step guide will walk you through a simple procedure to replace iPod Nano 1G screen. The LCD (screen) or Liquid Crystal Diode screen needs to be replaced for any number of reasons. The most common reasons are a cracked LCD screen, blinking screen, dark or dead iPod screen. The good news about this particular type of broken iPod is, it is a relatively simple and inexpensive matter to do this screen repair. First read the steps carefully and when you understand everything. Then only try this, it is very easy to repair LCD screen. These steps are common for changing iPod faulty displace screen.


Tools needed to install iPod new LCD : 

2 nylon tools (included), one screwdriver and one slot-head screwdriver or knife blade.


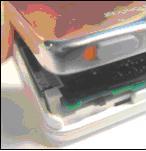
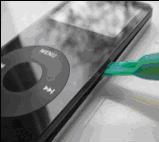
1.First turned off your iPod and insert one nylon tools(as shown in the picture). And create space to insert another tool now insert another tool and run it around. So it will separate back plate and upper body of
iPod. This is first step to disassemble iPod for screen repair.

How to install iPod new LCD
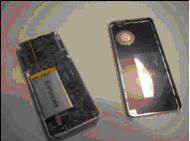
2. Remove the back plate and set aside.iPod LCD changing procedure
3. Now keep the battery aside. DO NOT cut the wires of battery which are soldered with PCB Motherboard. PCB stand for Printed Circuit Board.
How to replace LCD of iPod
4. Unscrew the 3 small screws (2 with fine thread and 1 with coarse thread). These screw are fixed on the main circuit board. To remove one of the screws, you may need to peel back a bit of protective tape.
How to open iPod to change LCD screen
5. Lift up the end of the main board about 1/4 inch. Here you will open iPod to change faulty LCD with new LCD screen.
Disassemble iPod for screen repair
6. Insert a small flat-head screwdriver pull/ pry up the front of the board with care. The LCD screen is held with adhesive on the back side of the board(see the photo) and it will pull away. Be careful do not scratch
the inside of the LCD screen. You have disassemble iPod and remove non working iPod front display screen.
Assemble iPod for screen replacement
7. There are 2 clips on the LCD screen which attach the bottom of the LCD screen to the main board. Unlock the clips away from the main board. You have completely disassemble iPod screen for repair.
How to disassemble ipod screen
8.Now Slide the LCD screen towards the top of the iPod. This will take apart LCD screen from iPod.
How to disassemble ipod for troubleshooting
9. carefully keep all the open iPod parts together! You need those part for iPod assemble and to install new screen.
How to repair ipod display screen
10. Lift up upper body plate as shown. You have completely disassemble iPod. You can repair iPod screen and change iPod screen with new display LCD.
How to disassemble ipod complately